Golang Guide [Template]
Introduction
This guide uses the Golang based, open source, app-template and provides the foundations needed for a production-ready app.
If you prefer working in a different language than Golang, check out our other template guides or use the Postman Guide to grasp the fundamentals and implement something from scratch in the programming language of your choice!
Implementing
Grab a cup of hot cocoa (☕) and strap in.
We're now going to implement a Blacklist app using the Golang based, open source, app-template project from Noona.
The Blacklist app will implement its name, a blacklist, to automatically deny appointment requests from the Marketplace made by specific customers.
Follow the instructions in app-template to scaffold a new app implementation.
Since we're implementing an app called Blacklist, app-blacklist feels like an appropriate name. This is the repository I created from the template.
Go over to Noona HQ and log-in/create a company that will serve as the basis of development and testing for this new app.
Log into our Developer Platform and create a new app.
Name: Blacklist
Scopes: events.read, events:write, customer_groups:read, customer_groups:write, customers:read, user:read, notifications:write, companies:read
Main Redirect URI: http://localhost:8080/oauth/callback
Visibility: Public, App Store, Show in navigation
Scopes
These are the resources we will be able to interact with when a user installs the app.
Redirect URI
This is the endpoint that Noona will send the user to when he clicks 'Approve' on the consent screen.
Public
When an app is marked as public - other companies will be able to install it. If this check is omitted the app will only be available within the company that created it.
App store
An app can be public without being visible in the app store. The use case is an external system that has some integration with Noona but is not interested in the app being shown in the app store.
Show in navigation
Apps created with this option enabled will be rendered via an iFrame inside of the main navigation in Noona HQ.
Click Save.
In the general settings tab we see:
- The Client ID
- The Client Secret
If we navigate to the dashboard we see:
- That our app has not been approved (It's in a pending state)
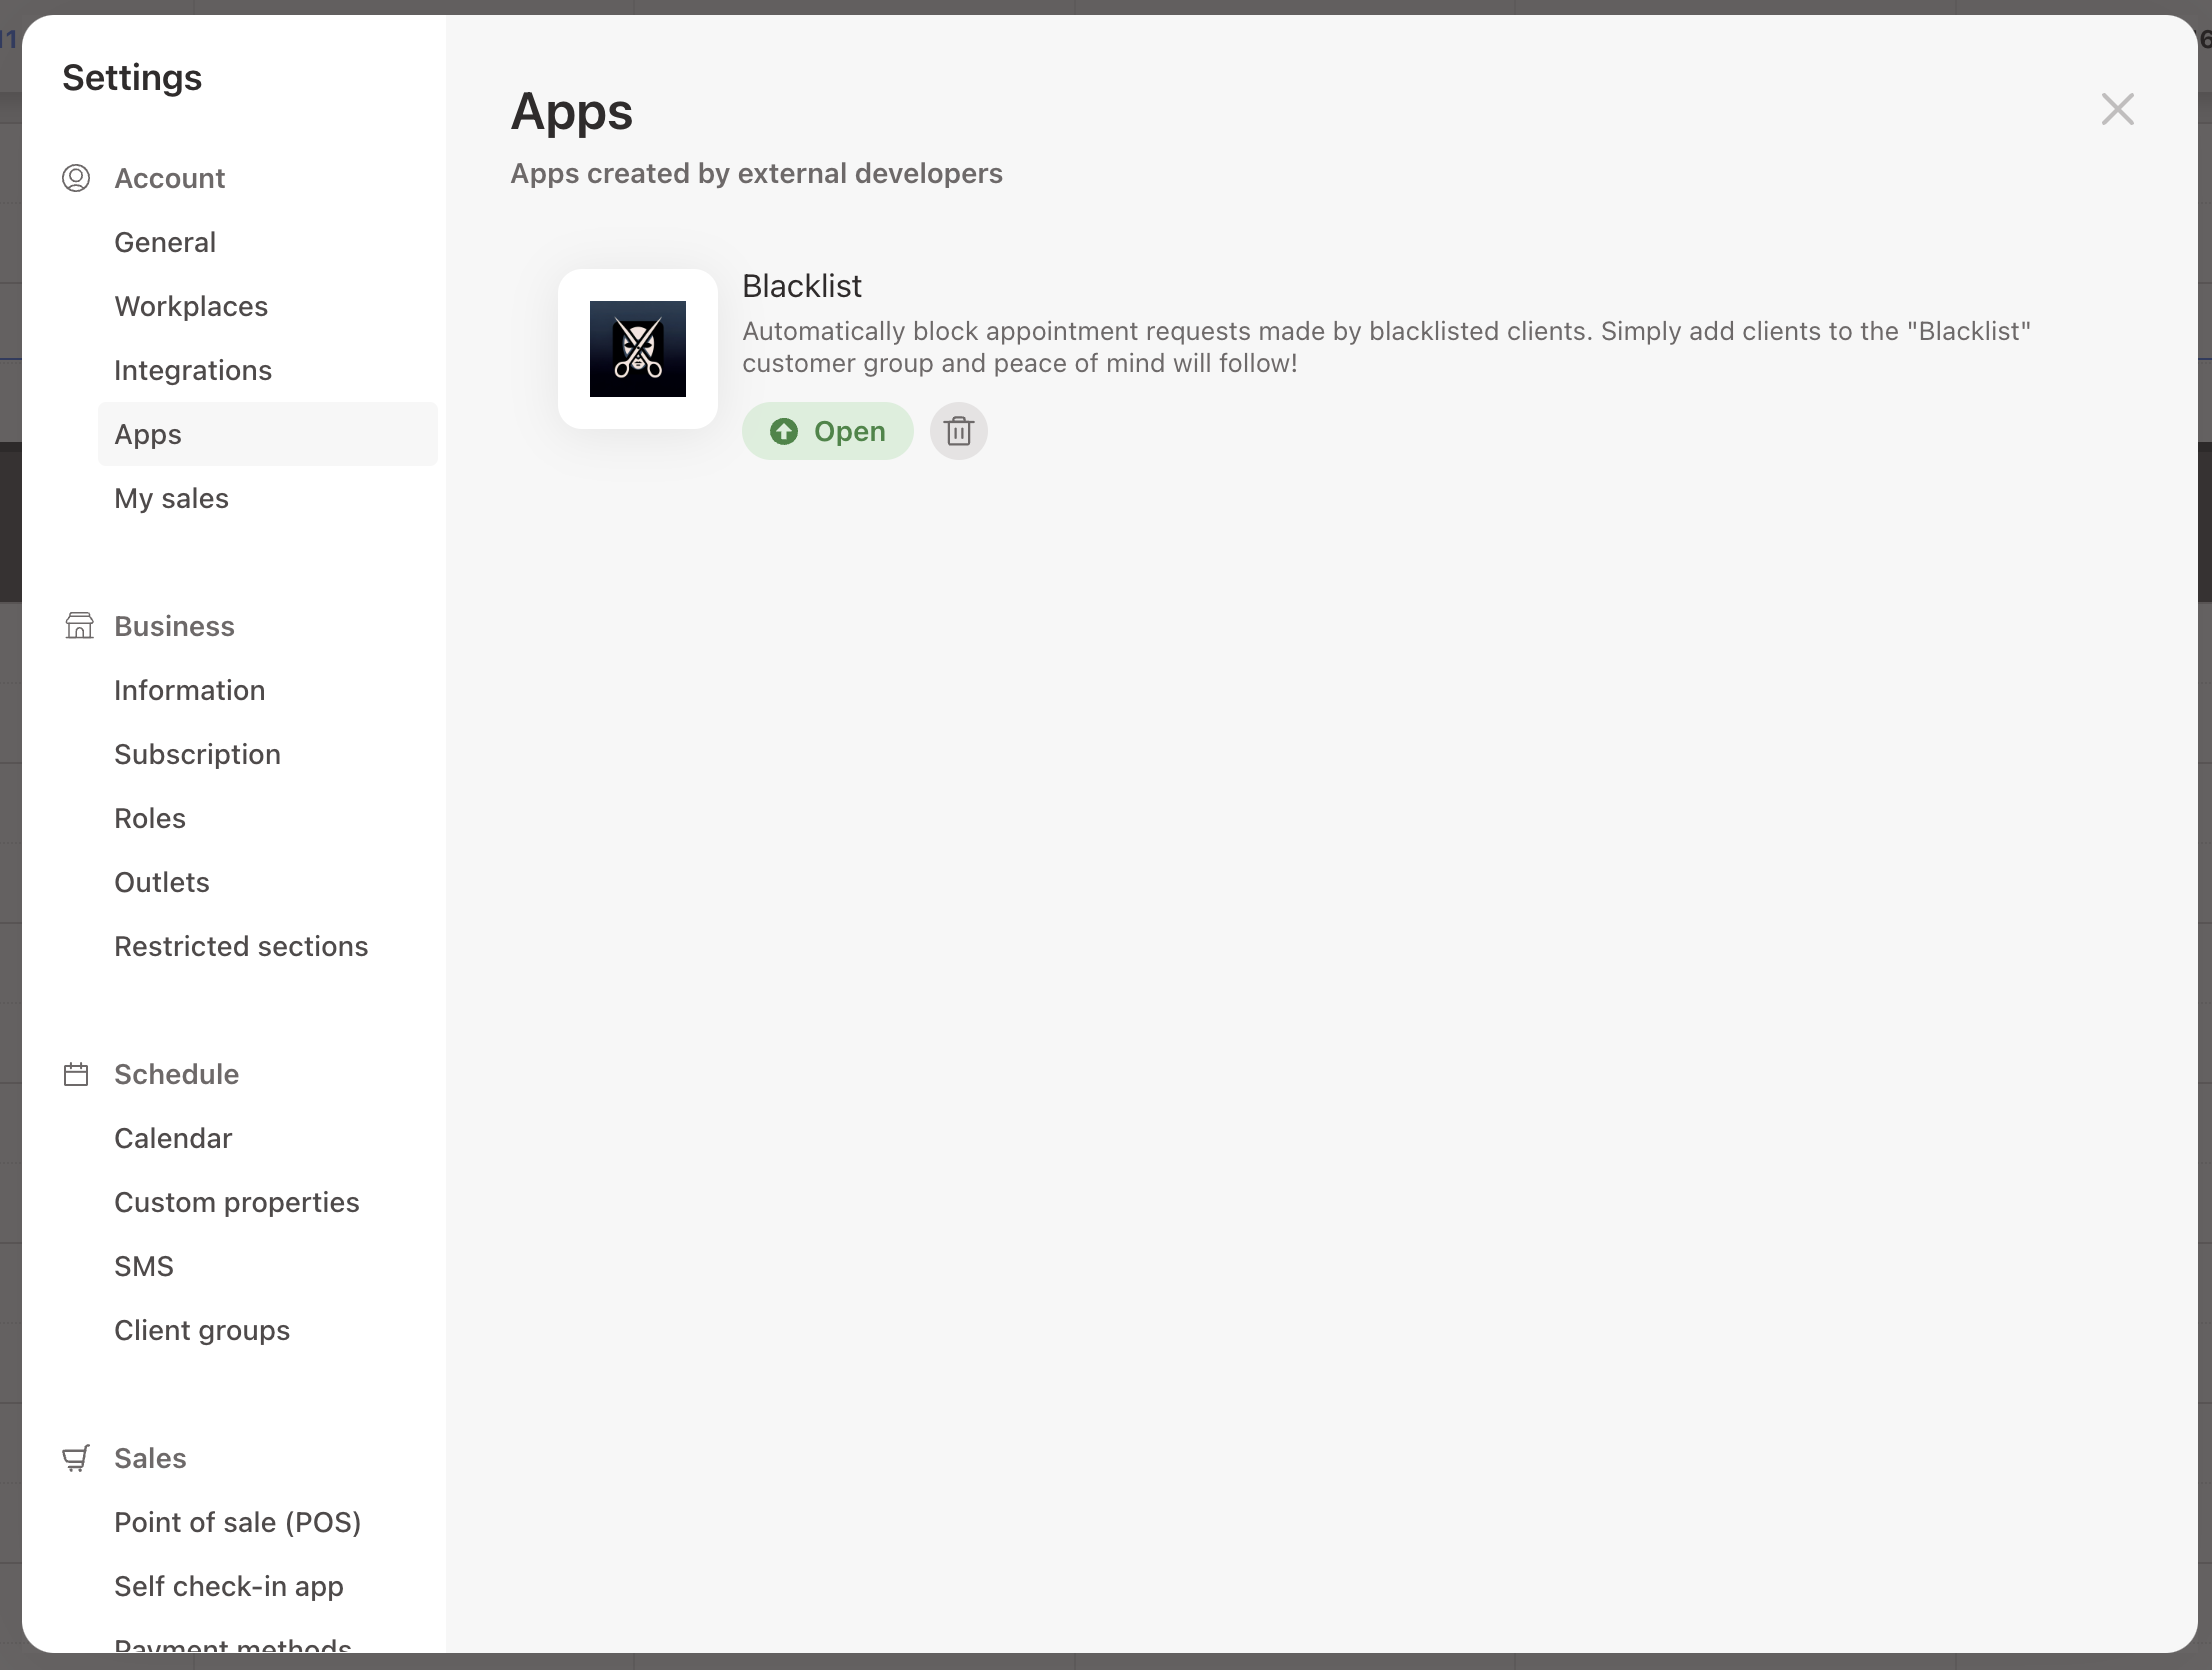
If we jump over to the app store, which is located in the settings hub, we see our app in the list.
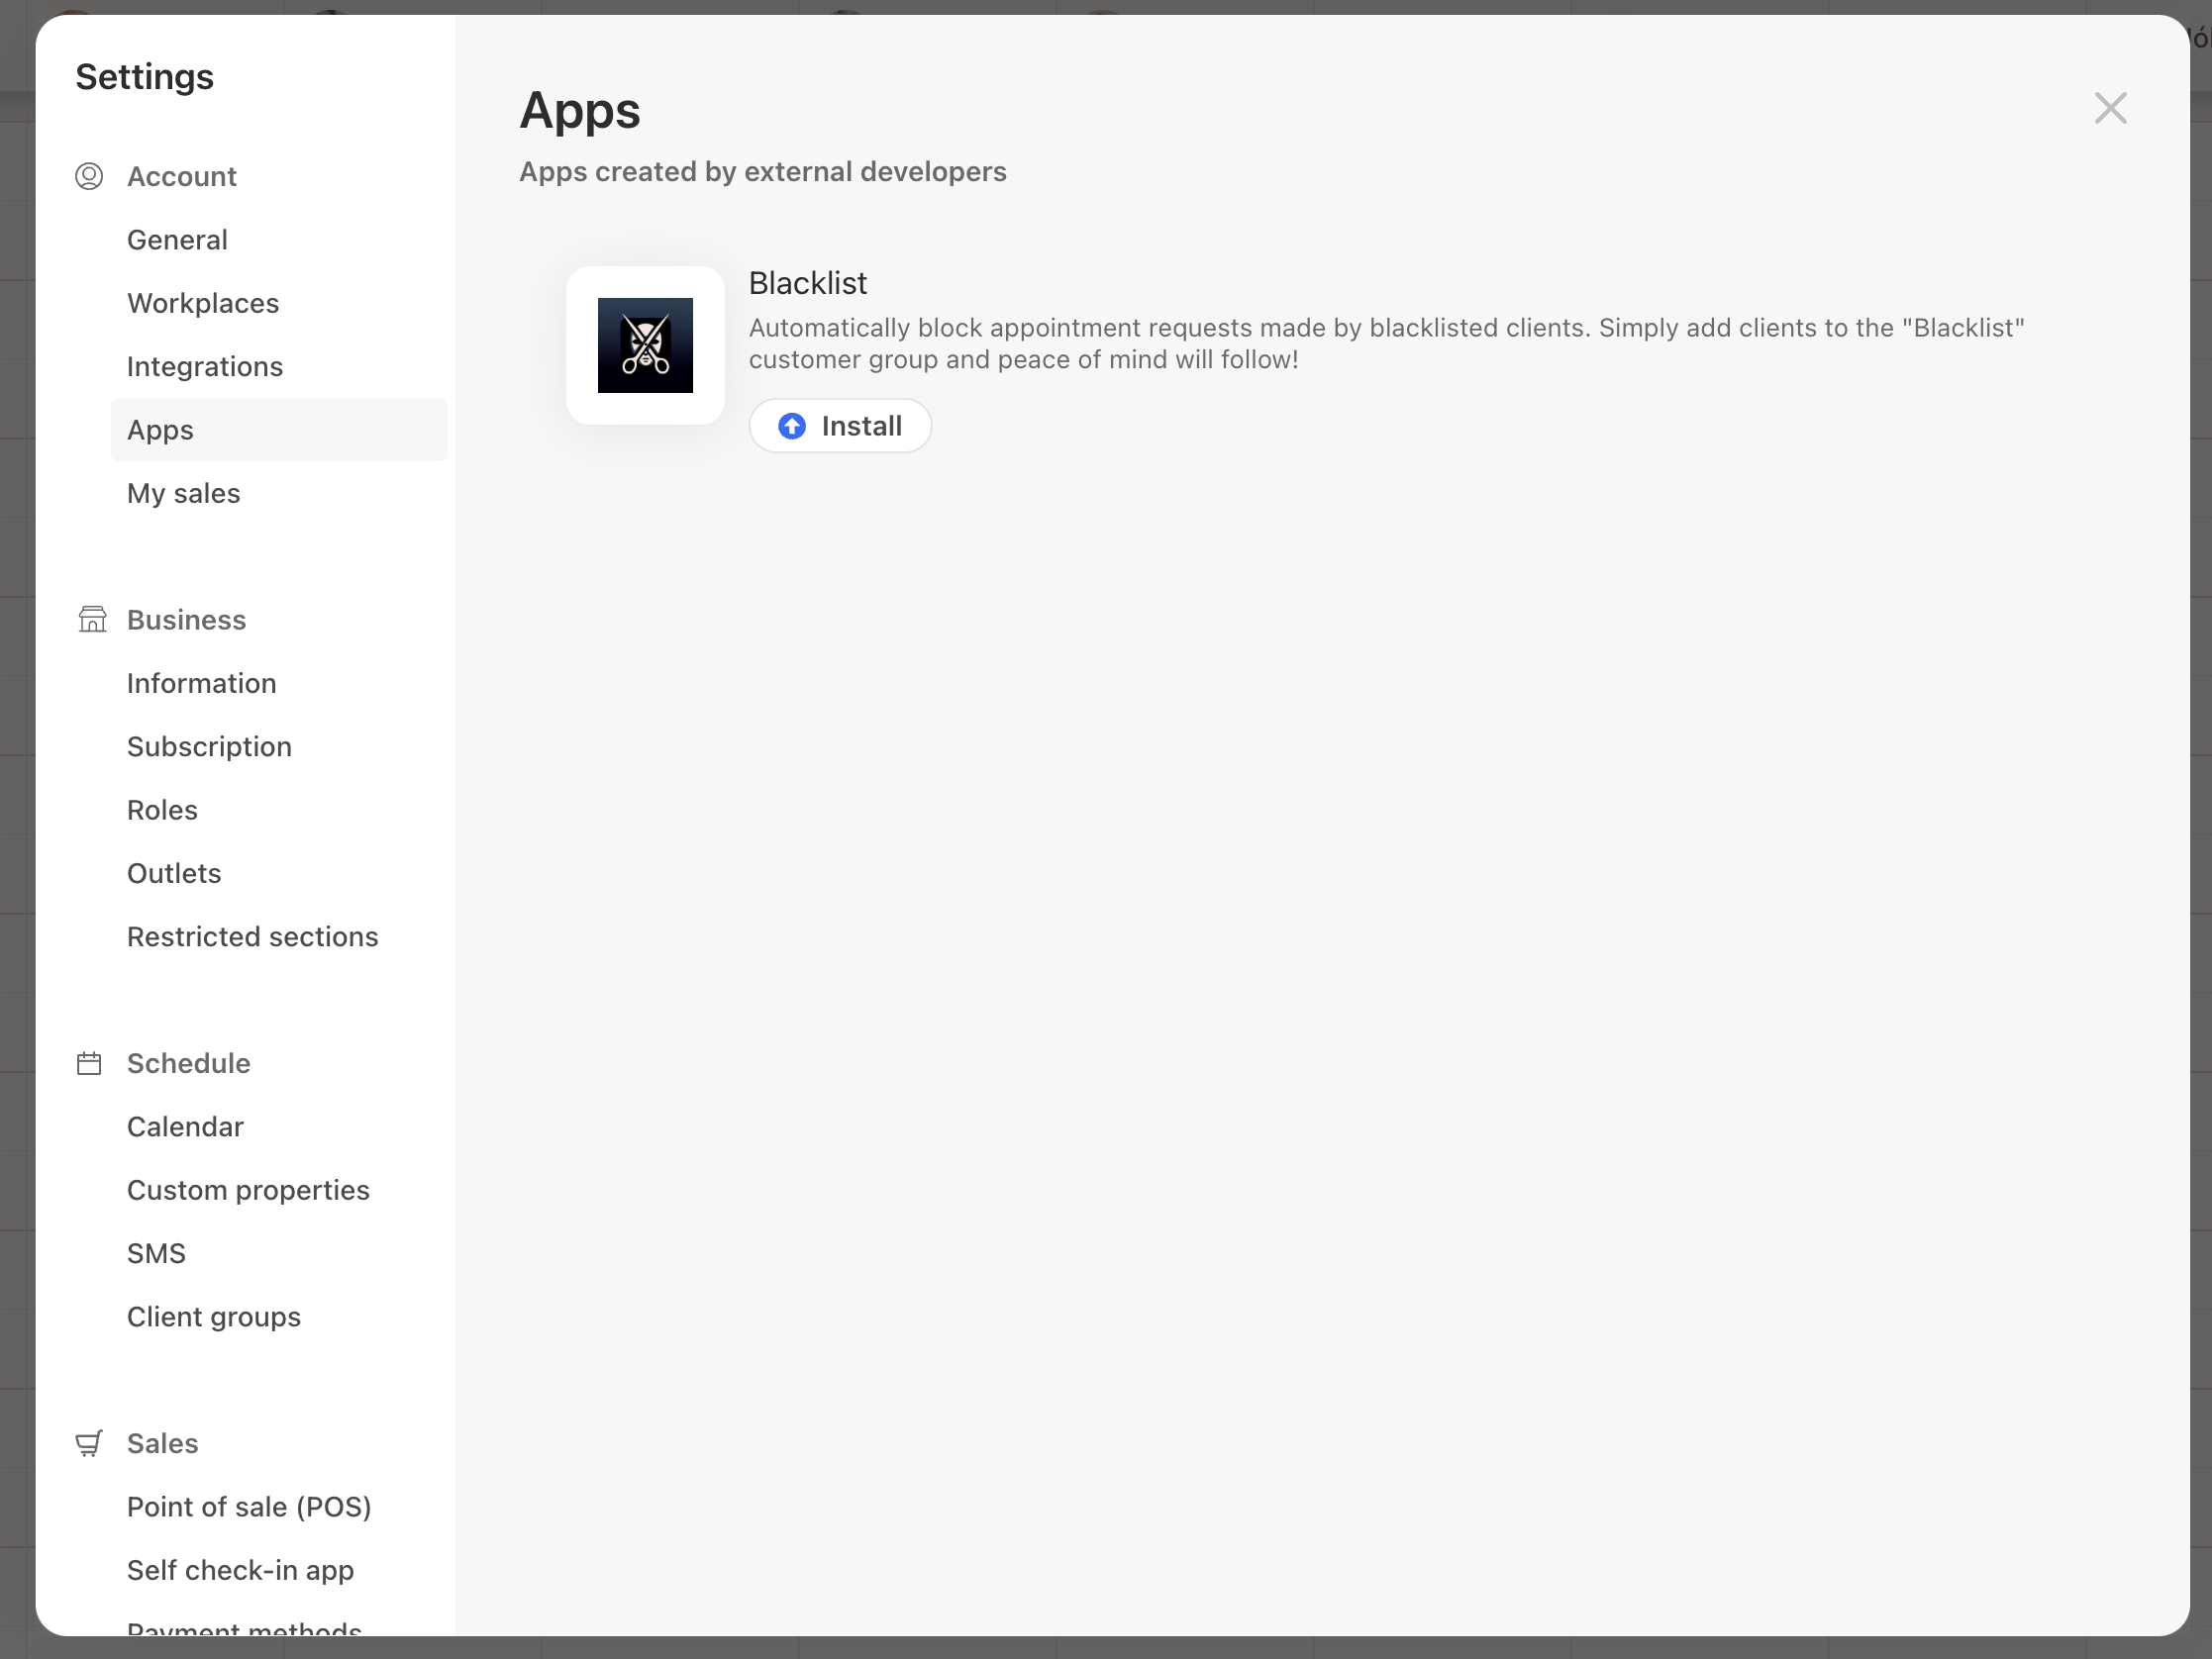
Since the app has not been approved, we are the only ones that see it. This gives us peace and quiet to implement the functionality behind it and once we're done. We can submit it for review.
Upon successful review and approval. The app appears to every company on Noona and they can install it.
Configuring our application.
Now that we have a client_id and a client_secret we can jump to our freshly scaffolded golang code and witness the magic.
The main config file we use is services/noona/config.go:
 package noona

 type Config struct {
     BaseURL         string `default:"https://api.noona.is"`
     AppStoreURL     string `default:"https://hq.noona.app/week#settings-apps"`
     ClientID        string `default:"G7NN26z5iAPhUFx2cvzcplEb"` // From our just-created app
     ClientSecret    string `default:"z9zSGtquC51PUW3fI4uO4kCW"` // From our just-created app
     // Our app will rely on webhooks to implement the Blacklist.
     // We need to know where the webhook should be sent.
     AppBaseURL      string `default:"http://localhost:8080"`
     // The Bearer token that all webhooks will be sent with
     AppWebhookToken string `default:"very-secure-token-secret"`
}dangerIt's not recommended to store credentials in the codebase. And the Client Secret should be kept very secure.
The neat thing about the structure of the golang project is that we can set it via an environment variable like this:
$ NOONA_CLIENTSECRET=z9zSGtquC51PUW3fI4uO4kCWLet's test it out!
Run the project using the memory store.
Memory store
The template app defaults to using MongoDB, which is what we use for persistency for our in-house built apps. It's also possible to run the app with an in-memory implementation.
$ STORE=memory make run
Output:
go run main.go
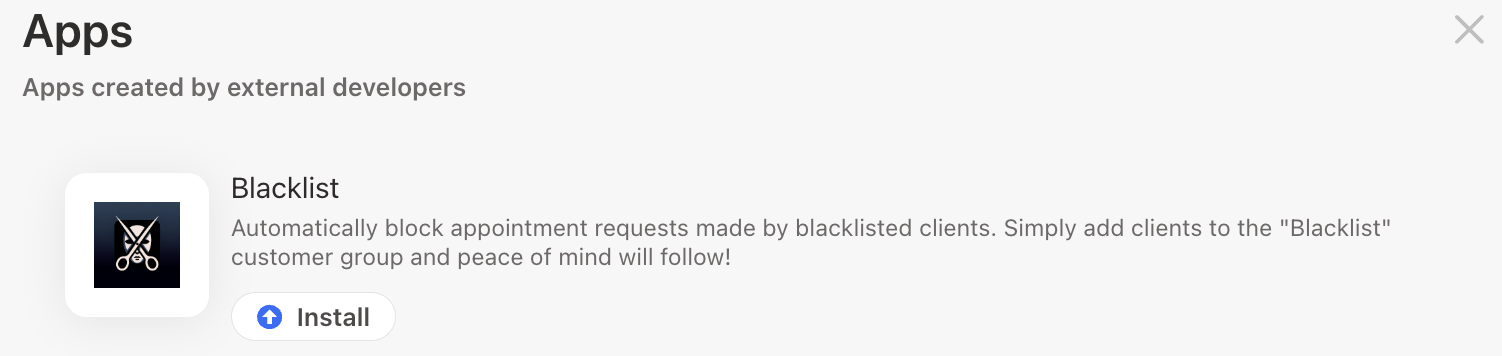
2024-03-11T13:59:29.283Z INFO Server started on :8080Navigate to the app list and click Install.
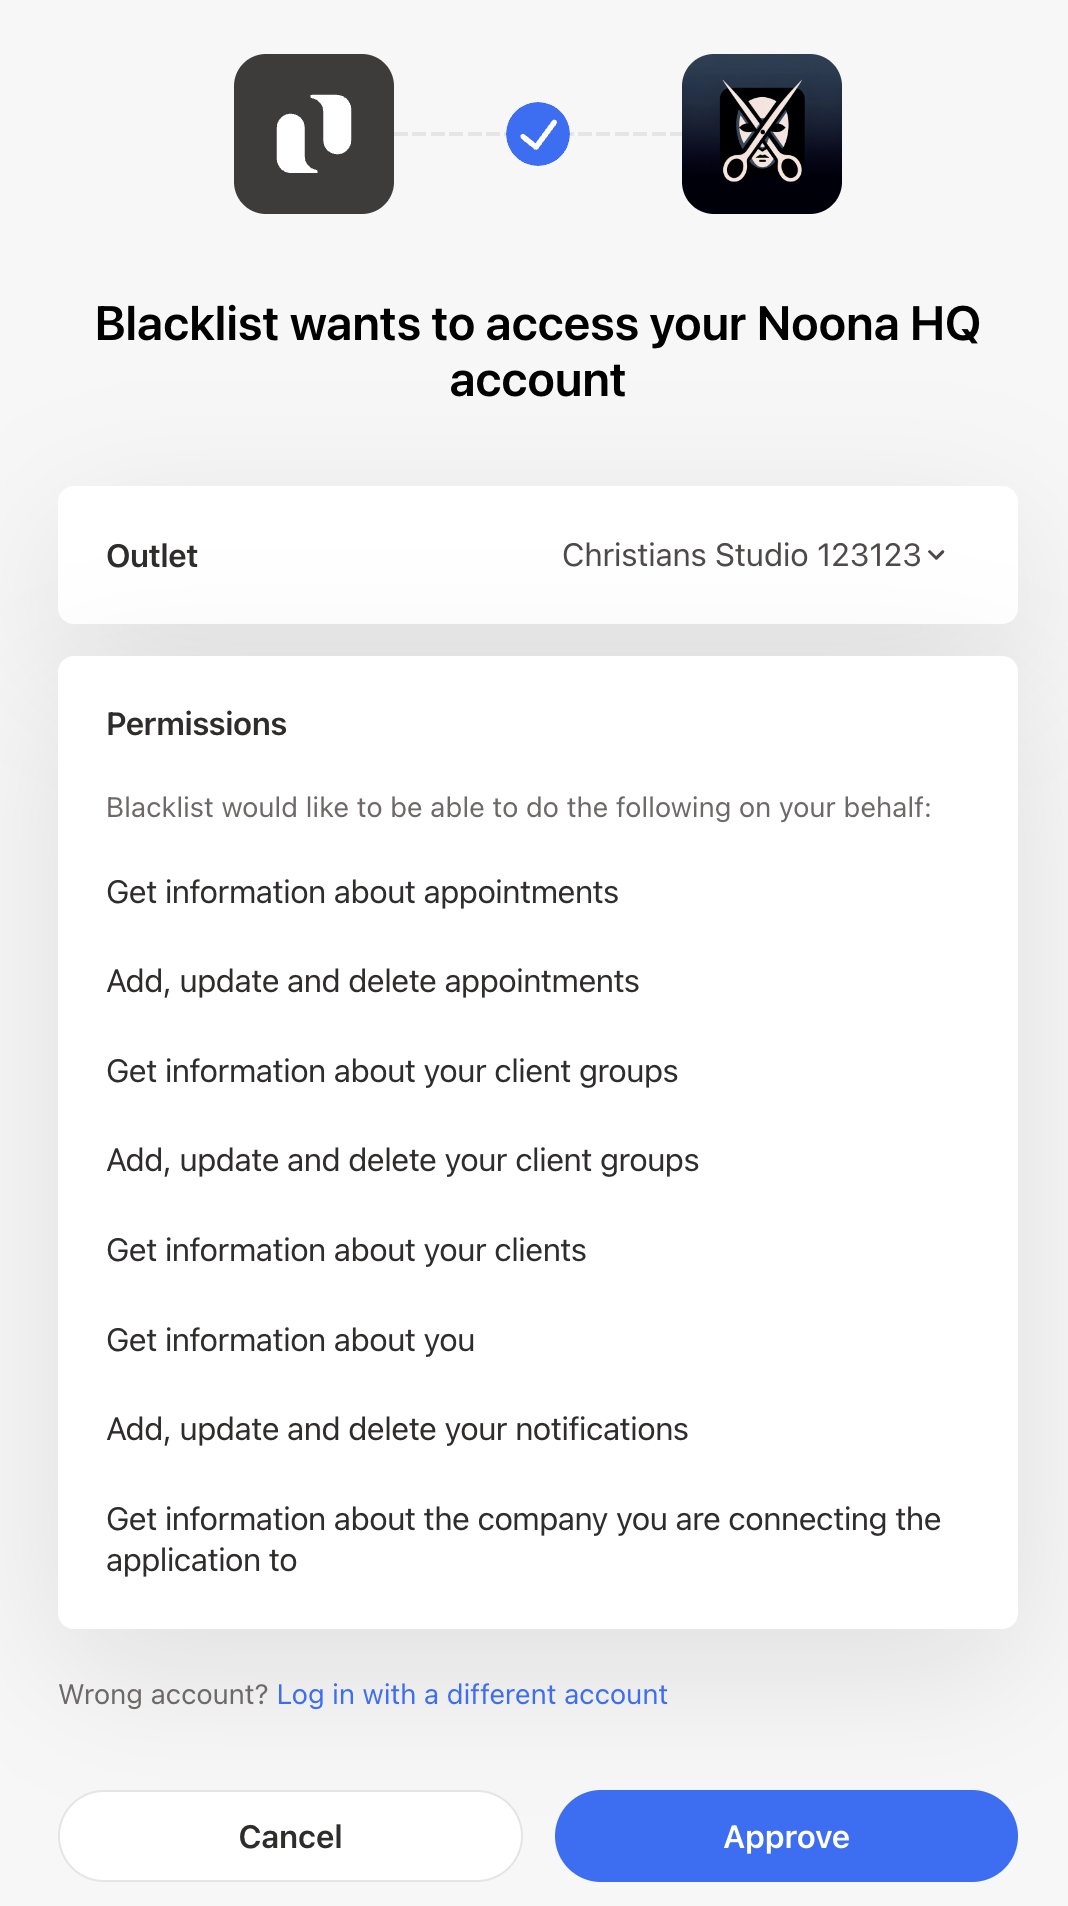
Click Approve on the consent screen.
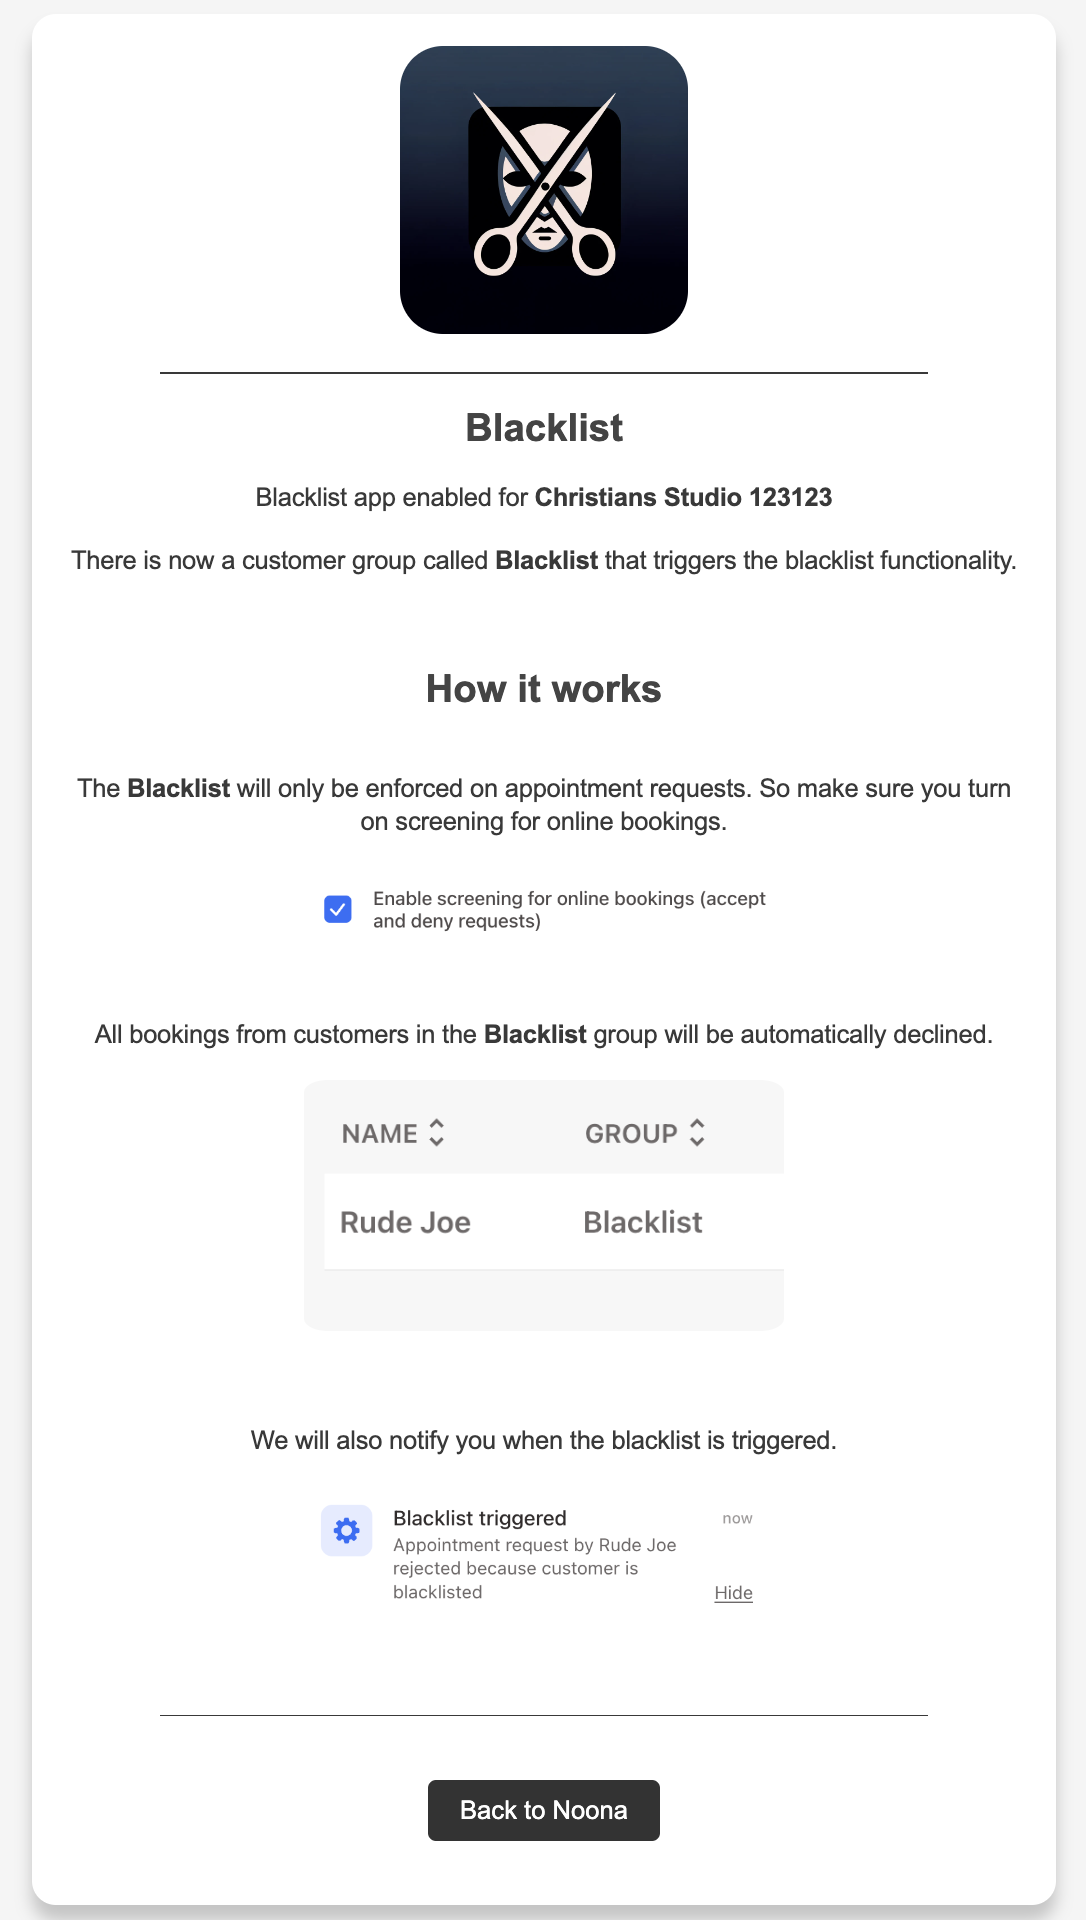
We see the landing page for our app, I've added information specific to the Blacklist so you're seeing something more raw.
If we look at our terminal we see that something happened!
2024-03-11T14:04:34.930Z    INFO    Onboarding user to app
2024-03-11T14:04:36.093Z    INFO    User onboarded to app   {"email": "developer-support@noona.app", "company_id": "4aF8uQmKtowFKdguf"}
This means that we successfully exchanged the authorization code (Which was can see in the URL above) with an OAuth token (Refresh+Access token) and created the user in our memory store.
If we click Back to Noona on the landing page for our app we get sent back to the app list within Noona.
The app is now installed!
infoAn app is considered installed when an OAuth Token exists in Noona tied to that specific app. Since we successfuly exchanged the authorization code above for an OAuth Token the Blacklist app is marked as installed in the app list.
This means that we can perform queries and mutations against Noona API within the scopes defined by our application.
If a user presses the trash can icon next to our app. The OAuth Token is deleted and:
- The app is no longer marked as Installed
- Our access token does not work
- We are not able to get a new access token with our refresh token
But what happened exactly?
I recommend looking through the code to get the full picture. But in short:
The redirect URL we specified earlier has the following path: /oauth/callback
This is tied to a handler that gets the code (Authorization code) from the query parameter in the redirect that happens after the consent step and invokes the OnboardUser in the core service.
func (s Service) OnboardUser(code string) (*noonasdk.User, error) {
    s.logger.Infow("Onboarding user to app")

    // Here we exchange the code for an OAuth Token.
    token, err := s.anonymousClient.CodeTokenExchange(code)
    if err != nil {
        return nil, errors.Wrap(err, "error exchanging code for token")
    }
    // We create a new Noona API client with the OAuth Token.
    client, err := s.noona.Client(*token)
    if err != nil {
        return nil, errors.Wrap(err, "error getting auth noona client")
    }

    // We call Noona API to get user information.
    noonaUser, err := client.GetUser()
    if err != nil {
        return nil, errors.Wrap(err, "error getting user")
    }

    // We translate it to a user entity that our app understands.
    user, err := s.noonaUserAsUser(noonaUser, token)
    if err != nil {
        return nil, errors.Wrap(err, "error converting noona user to user")
    }

    // We scaffold resources.
    // For Blacklist this means creating a 'Blacklist' customer group.
    // and a webhook that watches Appointment creations.
    if err := s.scaffoldNoonaResourcesForApp(client, user.CompanyID); err != nil {
        return nil, errors.Wrap(err, "error scaffolding noona resources")
    }

    // Create the user in our memory store.
    if err := s.store.CreateUser(user); err != nil {
        return nil, errors.Wrap(err, "error creating user")
    }

    s.logger.Infow("User onboarded to app", "email", user.Email, "company_id", user.CompanyID)

    return noonaUser, nil
}
The most important aspect is the Token exchange. Let's look at that method.
func (n AnonymousClient) CodeTokenExchange(code string) (*noona.OAuthToken, error) {
    tokenResponse, err := n.Client.GetOAuthTokenWithResponse(context.Background(), &noona.GetOAuthTokenParams{
        // The client_id and client_secret we got when we created our application above.
        ClientId:     n.cfg.ClientID,
        ClientSecret: n.cfg.ClientSecret,
    }, noona.GetOAuthTokenJSONRequestBody{
        // The code that we got from the redirect.
        Code:      &code,
        // The 'authorization_code' grant type is just for the initial exchange.
        // The 'refresh_token' grant type is used to refresh the access token in the future.
        GrantType: noona.AuthorizationCode,
    })
    if err != nil {
        return nil, errors.Wrap(err, "Error in code exchange")
    }

    if tokenResponse.StatusCode() != http.StatusOK {
        return nil, errors.New("Error in code exchange")
    }

    return tokenResponse.JSON200, nil

}
The token endpoint is open and does not require authentication. Which is why we can use this anonymous client wrapper.
This is the endpoint that is being used behind the scenes
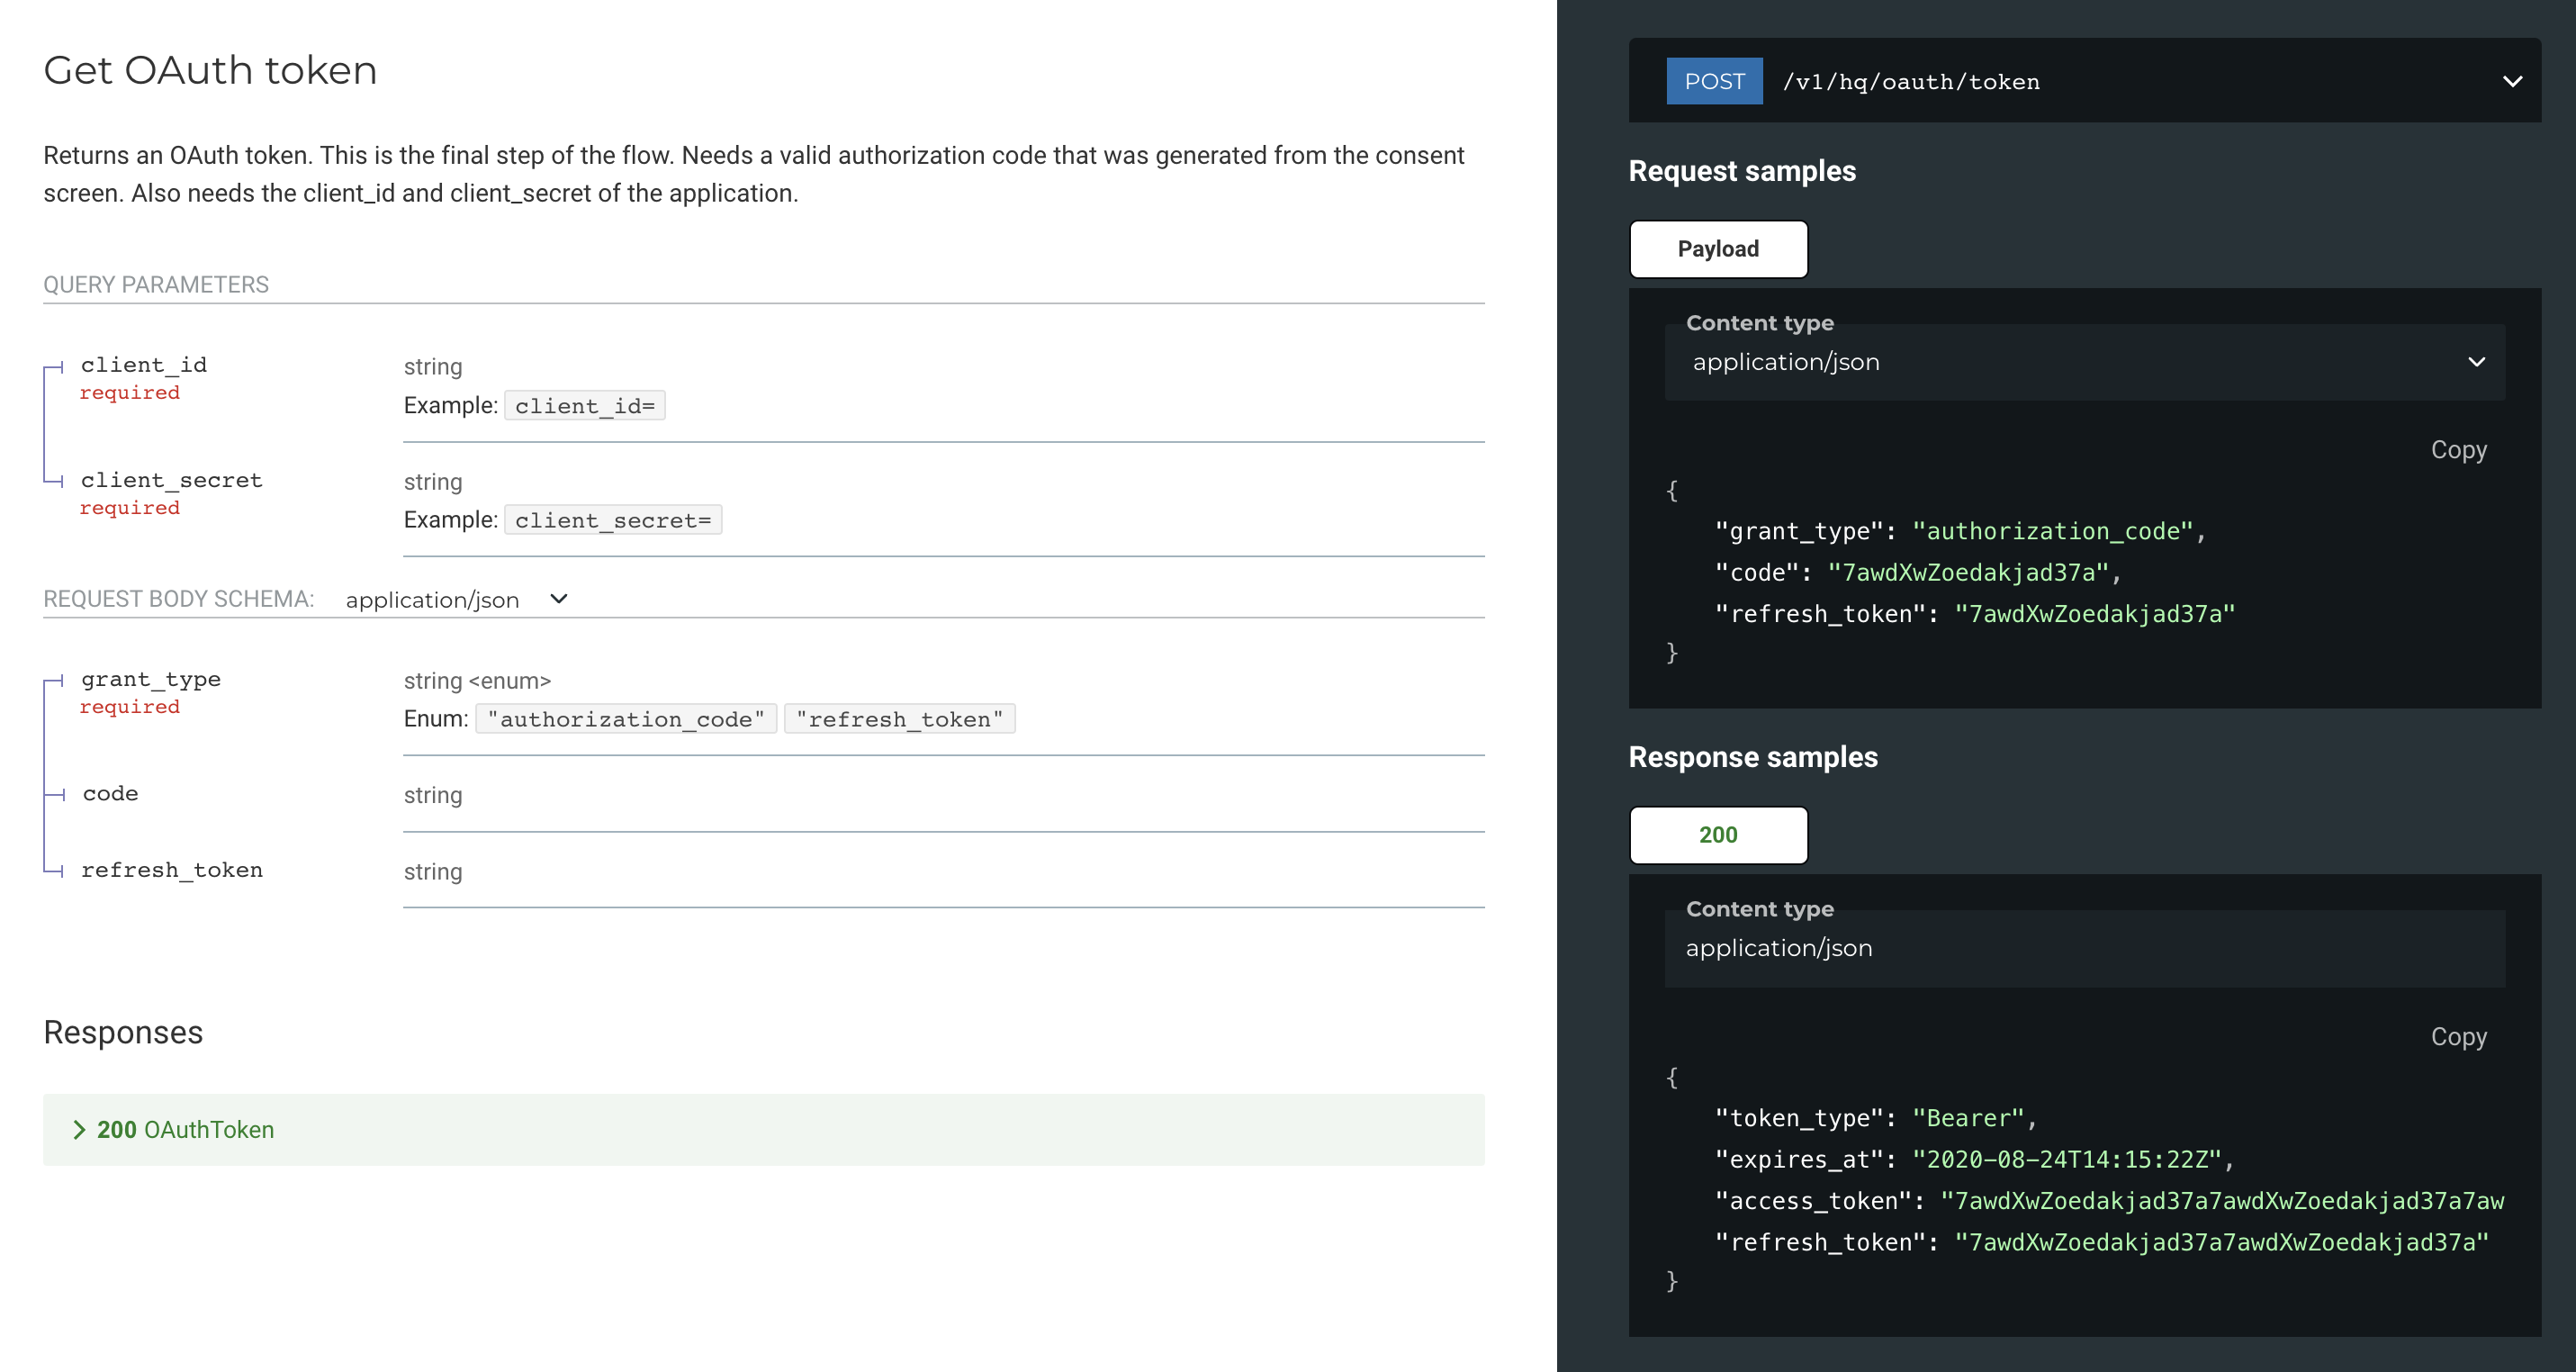
We are then using the returned Access Token to create an authenticated client against Noona API.
func (s Service) Client(token noona.OAuthToken) (Client, error) {
    if token.AccessToken == nil {
        return Client{}, errors.New("No access token in OAuth token")
    }

    client, err := noona.New(*token.AccessToken, noona.ClientOptions{
        BaseURL: s.cfg.BaseURL,
    })
    if err != nil {
        return Client{}, errors.Wrap(err, "Error creating auth Noona client")
    }

    return Client{Client: client, cfg: s.cfg}, nil
}
The access token expires in 60 minutes. At that point we must use our refresh token to obtain a new access token.
We do this in the ProcessWebhookCallback method in our core service. That method handles the actual blacklisting logic.
We have a method that abstracts this refresh from our actual business logic:
func (s Service) getOAuthTokenFromUser(user entity.User) (noonasdk.OAuthToken, error) {
    oAuthToken := noonasdk.OAuthToken{
        RefreshToken: &user.Token.RefreshToken,
        AccessToken:  &user.Token.AccessToken,
        ExpiresAt:    &user.Token.AccessTokenExpiresAt,
    }

    if oAuthToken.ExpiresAt.Before(time.Now().Add(time.Minute * 5)) {
        token, err := s.anonymousClient.RefreshTokenExchange(user.Token.RefreshToken)
        if err != nil {
            return noonasdk.OAuthToken{}, errors.Wrap(err, "error refreshing token")
        }

        oAuthToken = noonasdk.OAuthToken{
            RefreshToken: token.RefreshToken,
            AccessToken:  token.AccessToken,
            ExpiresAt:    token.ExpiresAt,
        }

        if _, err := s.store.UpdateUser(user.ID, entity.User{Token: entity.Token{
            AccessToken:          *token.AccessToken,
            AccessTokenExpiresAt: *token.ExpiresAt,
        }}); err != nil {
            s.logger.Errorw("Error updating user", "error", err)
        }
    }

    return oAuthToken, nil
}
The method uses the RefreshTokenExchange method in our anonymous client. Opposed to the CodeTokenExchange used before.
func (n AnonymousClient) RefreshTokenExchange(refreshToken string) (*noona.OAuthToken, error) {
    tokenResponse, err := n.Client.GetOAuthTokenWithResponse(context.Background(), &noona.GetOAuthTokenParams{
        ClientId:     n.cfg.ClientID,
        ClientSecret: n.cfg.ClientSecret,
    }, noona.GetOAuthTokenJSONRequestBody{
        RefreshToken: &refreshToken,
        GrantType:    noona.RefreshToken,
    })
    if err != nil {
        return nil, errors.Wrap(err, "Error in refresh token exchange")
    }

    if tokenResponse.StatusCode() != http.StatusOK {
        return nil, errors.New("Error in refresh token exchange")
    }

    return tokenResponse.JSON200, nil
}
We created the webhook that tracks appointment creations like this:
func (a Client) SetupWebhook(companyID string) error {
    webhook := noona.Webhook{
        Title:       utils.StringPtr("Blacklist"),
        Description: utils.StringPtr("Watches event creation to enforce blacklist app functioinality."),
        CallbackUrl: utils.StringPtr(a.cfg.AppBaseURL + "/webhook"),
        Company: func() *noona.ExpandableCompany {
            company := noona.ExpandableCompany{}
            company.FromID(noona.ID(companyID))
            return &company
        }(),
        Enabled: utils.BoolPtr(true),
        Headers: &noona.WebhookHeaders{
            {
                Key:    utils.StringPtr("Authorization"),
                Values: &[]string{"Bearer " + a.cfg.AppWebhookToken},
            },
        },
        Events: &noona.WebhookEvents{
            noona.WebhookEventEventCreated,
        },
    }

    webhookResponse, err := a.Client.CreateWebhookWithResponse(context.Background(), &noona.CreateWebhookParams{}, noona.CreateWebhookJSONRequestBody(webhook))
    if err != nil {
        return errors.Wrap(err, "Error creating webhook")
    }

    if webhookResponse.StatusCode() != 200 {
        return errors.New("Error creating webhook")
    }

    return nil
}
I also added business logic around the creation of a Blacklist customer group, whether to deny an appointment request or not and more. Feel free to look through the code to grasp the full implementation!
One thing to note is that since we're only running the app locally Noona can't send us webhooks. We need to deploy our code behind some stable URL or use something like ngrok to simulate our code running on the web.
$ ngrok http 8080
Output:
Forwarding                    https://5b70-178-19-59-142.ngrok-free.app -> http://localhost:8080
We now need to update the redirect URI specified in the Application Management Page and our config:
package noona

type Config struct {
    ...
    AppBaseURL      string `default:"https://5b70-178-19-59-142.ngrok-free.app"`
    ...
}
Re-authentication
We previously authenticated the user by using the authorization code that gets sent our way when a user clicks Install in the app store.
An installed app is rendered differently in the app store. It has two distinct actions:
- Open, which allows the user to revisit the app landing page.
- Uninstall (Trash can), which the user clicks to uninstall the app.
Clicking open redirects the user to the app with the following query parameters:
?id_token=<jwt>&action=open
Clicking uninstall simply performs a GET request towards the app behind the scenes (In addition to invalidating all tokens etc.):
?id_token=<jwt>&action=uninstall
This allows the app to support editing settings, showing contextual information or metrics during the open action and to clean up any local state during the uninstall action.
The app can authenticate the user from the JWT payload:
{
  "aud": "G7NN26z4kEuhUFx2cvzcplEb",
  "company_id": "POpTt0aDLVxRN1c63miyTB9W",
  "email": "svessi@svessi.is",
  "exp": 1710926605,
  "iat": 1710924805,
  "iss": "api.noona.is",
  "sub": "LLN5gKPpDFgxQfrhb"
}
- The app fetches the Noona public key (Endpoint | Documentation).
- The public key is used to verify the signature of the token.
- We verify that the token was issued for our app (client_id), that the token is not expired and that the token was indeed issued by Noona.
- Now that we can trust the token, we use the payload to load a user from our local DB.
For the open action the app can now create a seassion for this user and show settings, metrics, data or whatever is applicable. Our Blacklist app simply shows the success screen again, with contextual information (Company name).
For the uninstall action Blacklist simply deletes this user from the database.